Debugging my PCB with sewing needles
Last June I graduated with a bachelor's degree in Electrical Engineering. My final year project was a noise suppression system for wired earbud microphones: a portable device designed to remove background noise from the mic, acting as a middleman between the earphones and anything with a 3.5mm TRRS headphone jack.
It was my second time designing a custom printed circuit board (PCB) and first time manually assembling and debugging one. It was a fun and challenging project, and I am quite satisfied with the result. I will eventually write up a blogpost about the whole thing — hardware, firmware, and all the delicate sensual splice of the two — but today I'd like to share a handy hardware troubleshooting technique that I developed while working on the project.
Some context: when I finally had a good, functional breadboard prototype on my hands, and was ready to lay out and route the analog PCB, I had less then one month until the presentation & demo date. I wanted to make sure that the board just works, and for that, I needed a reasonable testing system. I had no time nor money to order or build a probing jig just to test one board. Ironically, not having started working on the board was an advantage — it meant that I could bake verifiability into its very essence.
I once saw a reddit post where someone used a sewing pin connected to an alligator clip cable instead of a proper jumper wire on a breadboard. The pin was inserted into a breadboard socket, making dubious electrical connection, but staying quite upright nonetheless. I also remember seeing some comments from people who probed QFP-packaged integrated circuits in an identical manner, just also holding the needle in place with some contraption — a makeshift testing jig.
I marinated these musings about circuits and needles long and hard, had an idea or two, and then went to my local haberdashery down the street.
The technique
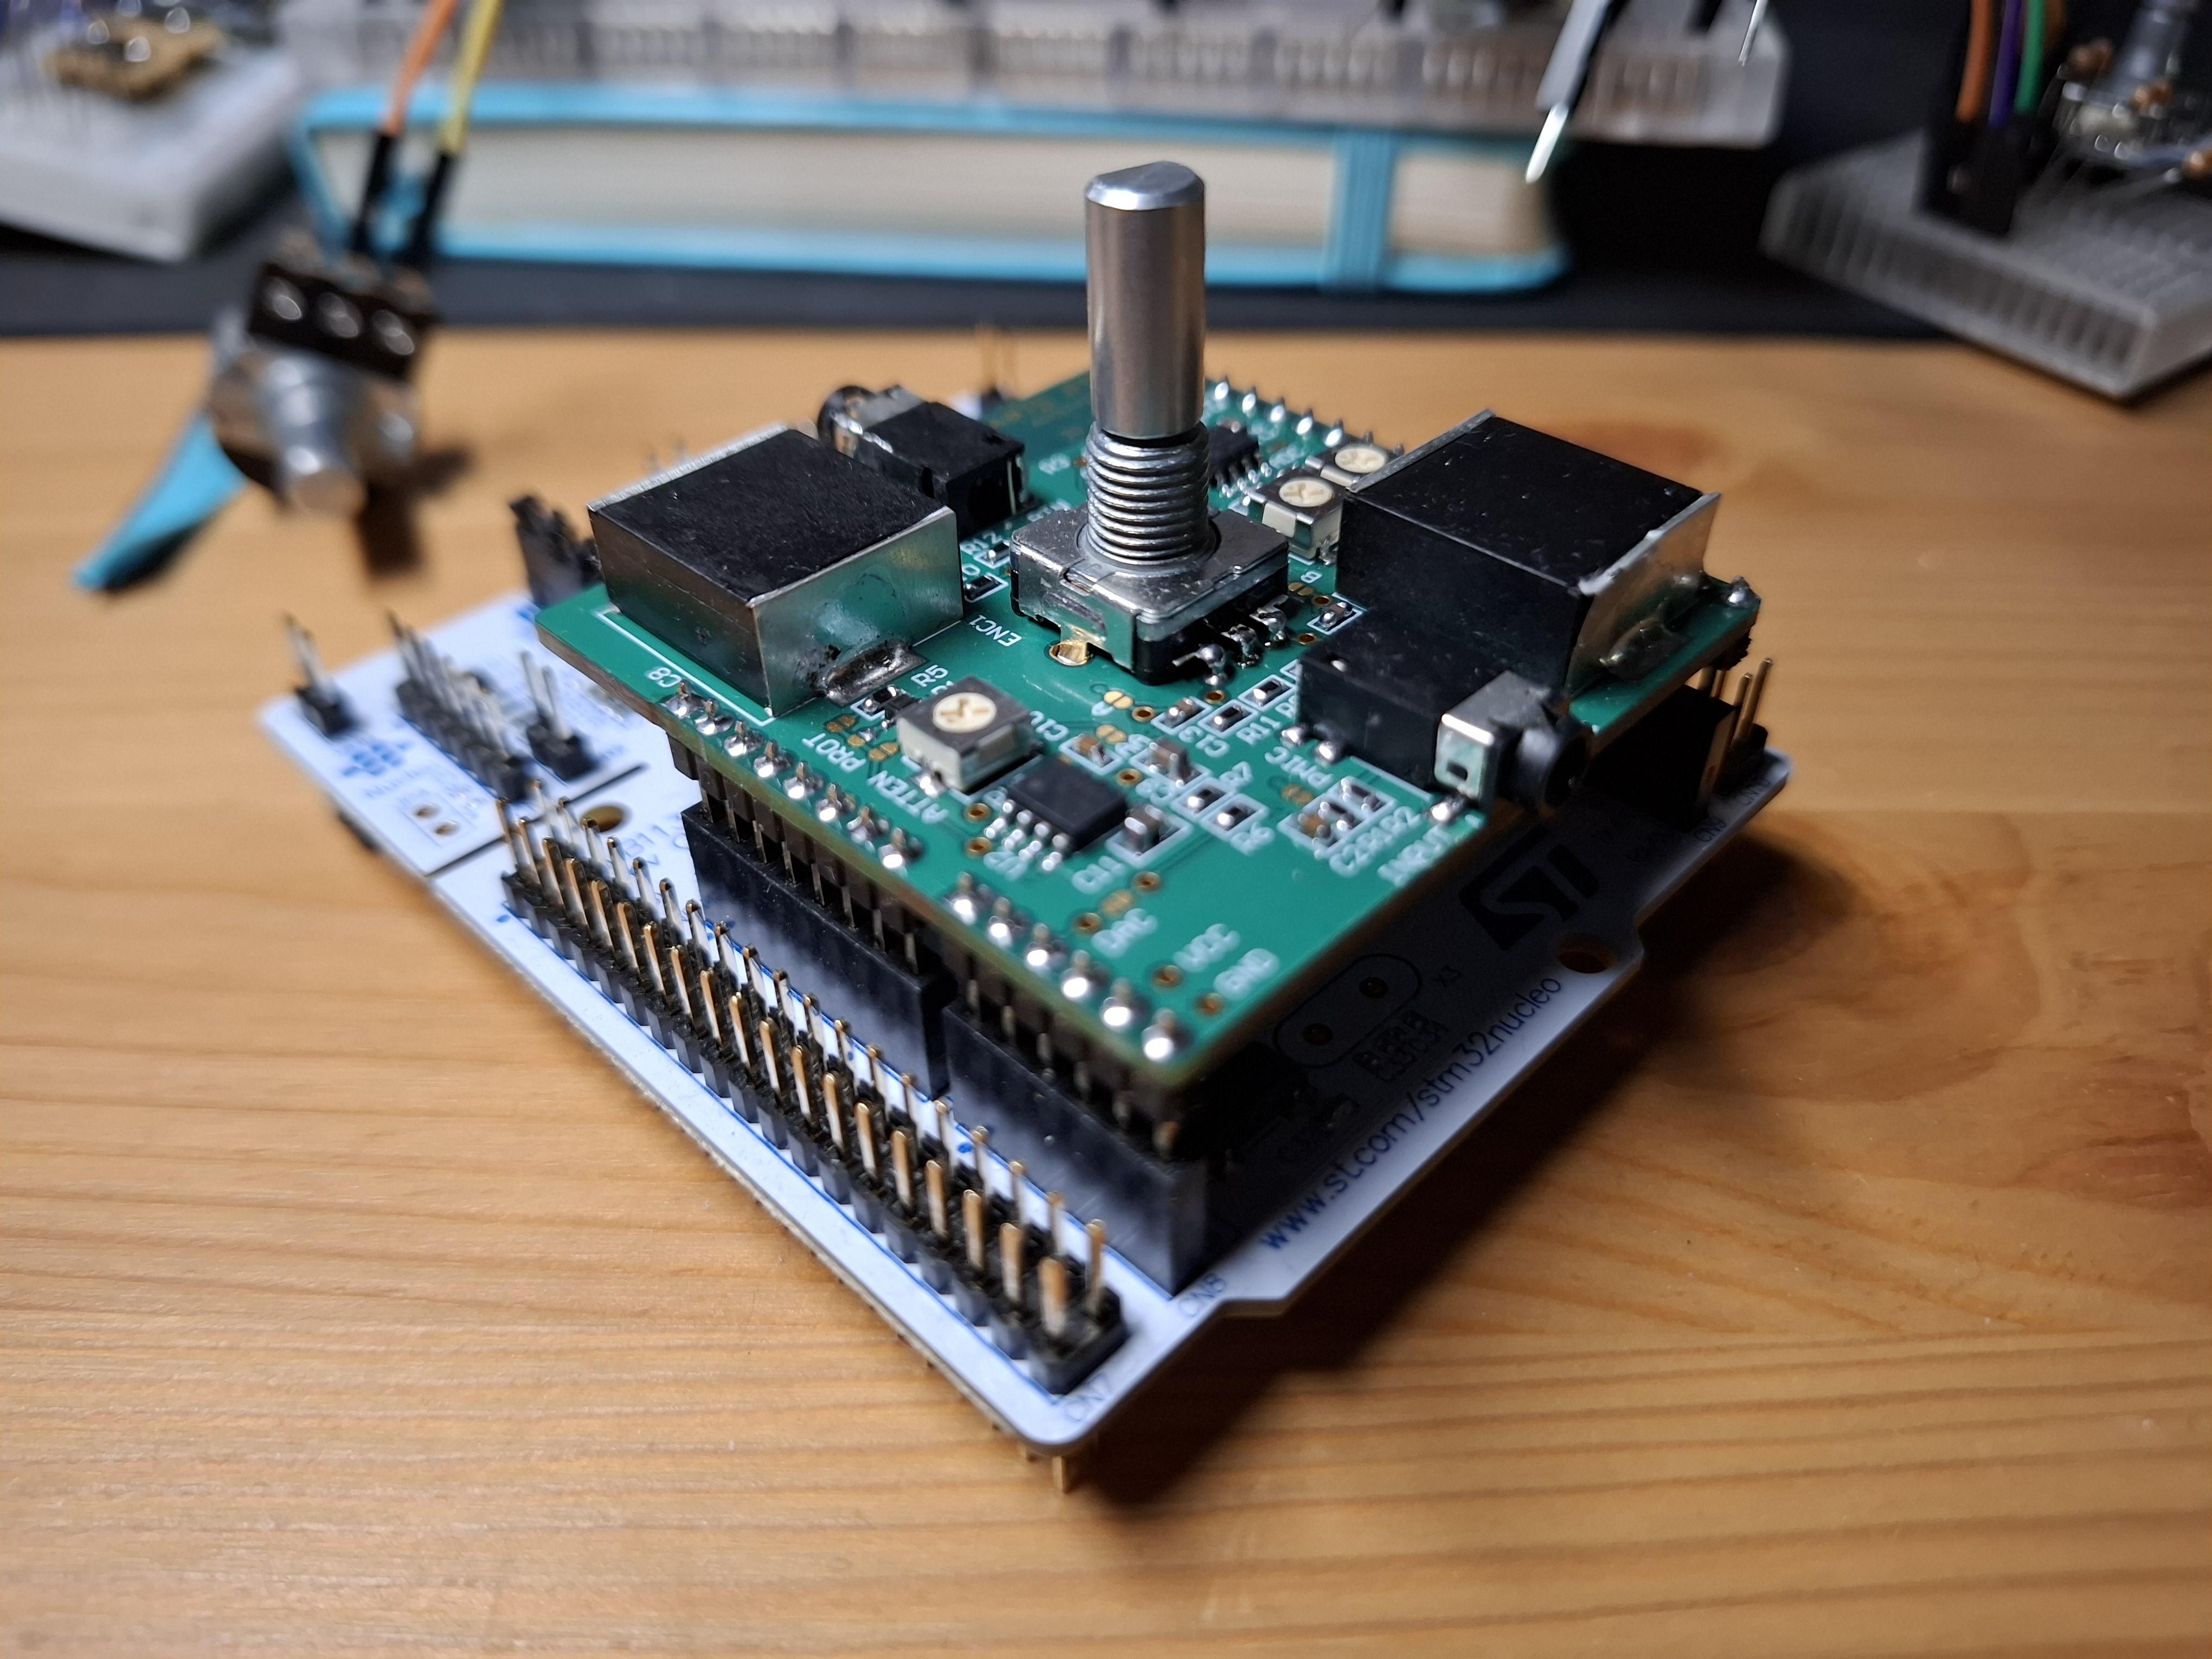
I strategically populated my board with plated through-hole test points, into which I could firmly insert sewing pins and, even better, tapestry needles. The holes are just a hair narrower than the needles are thick. This way, needles can be firmly pushed into the test points and remain vertically in place without external support (yahoo friction!) while making solid electrical contact. I routed all my internal signal nets of interest to these test points so that I could pin and probe them on demand.

I bought a few packs of John James size 22 tapestry needles, which, according to JJ, are 0.94mm in diameter. The test point hole diameter on my board, according the Altium Gerber viewer, is 1.20mm. I'm guessing JJ measures needle size at the tips? Either way, inserting JJ22 needles into 1.20mm holes feels just right and works like a charm.
I was thinking of inserting sewing pins into the holes and attach my oscilloscope, the wonderful Analog Discovery 3, either with standard issue passive BNC hook lead probes, or with alligator clips; in hindsight, both ideas sound awfully flimsy. Instead, I discovered that inserting the eyes of the upright needles into female "DuPont" connectors on the end of my jumper wires connected to the scope pins works really well:
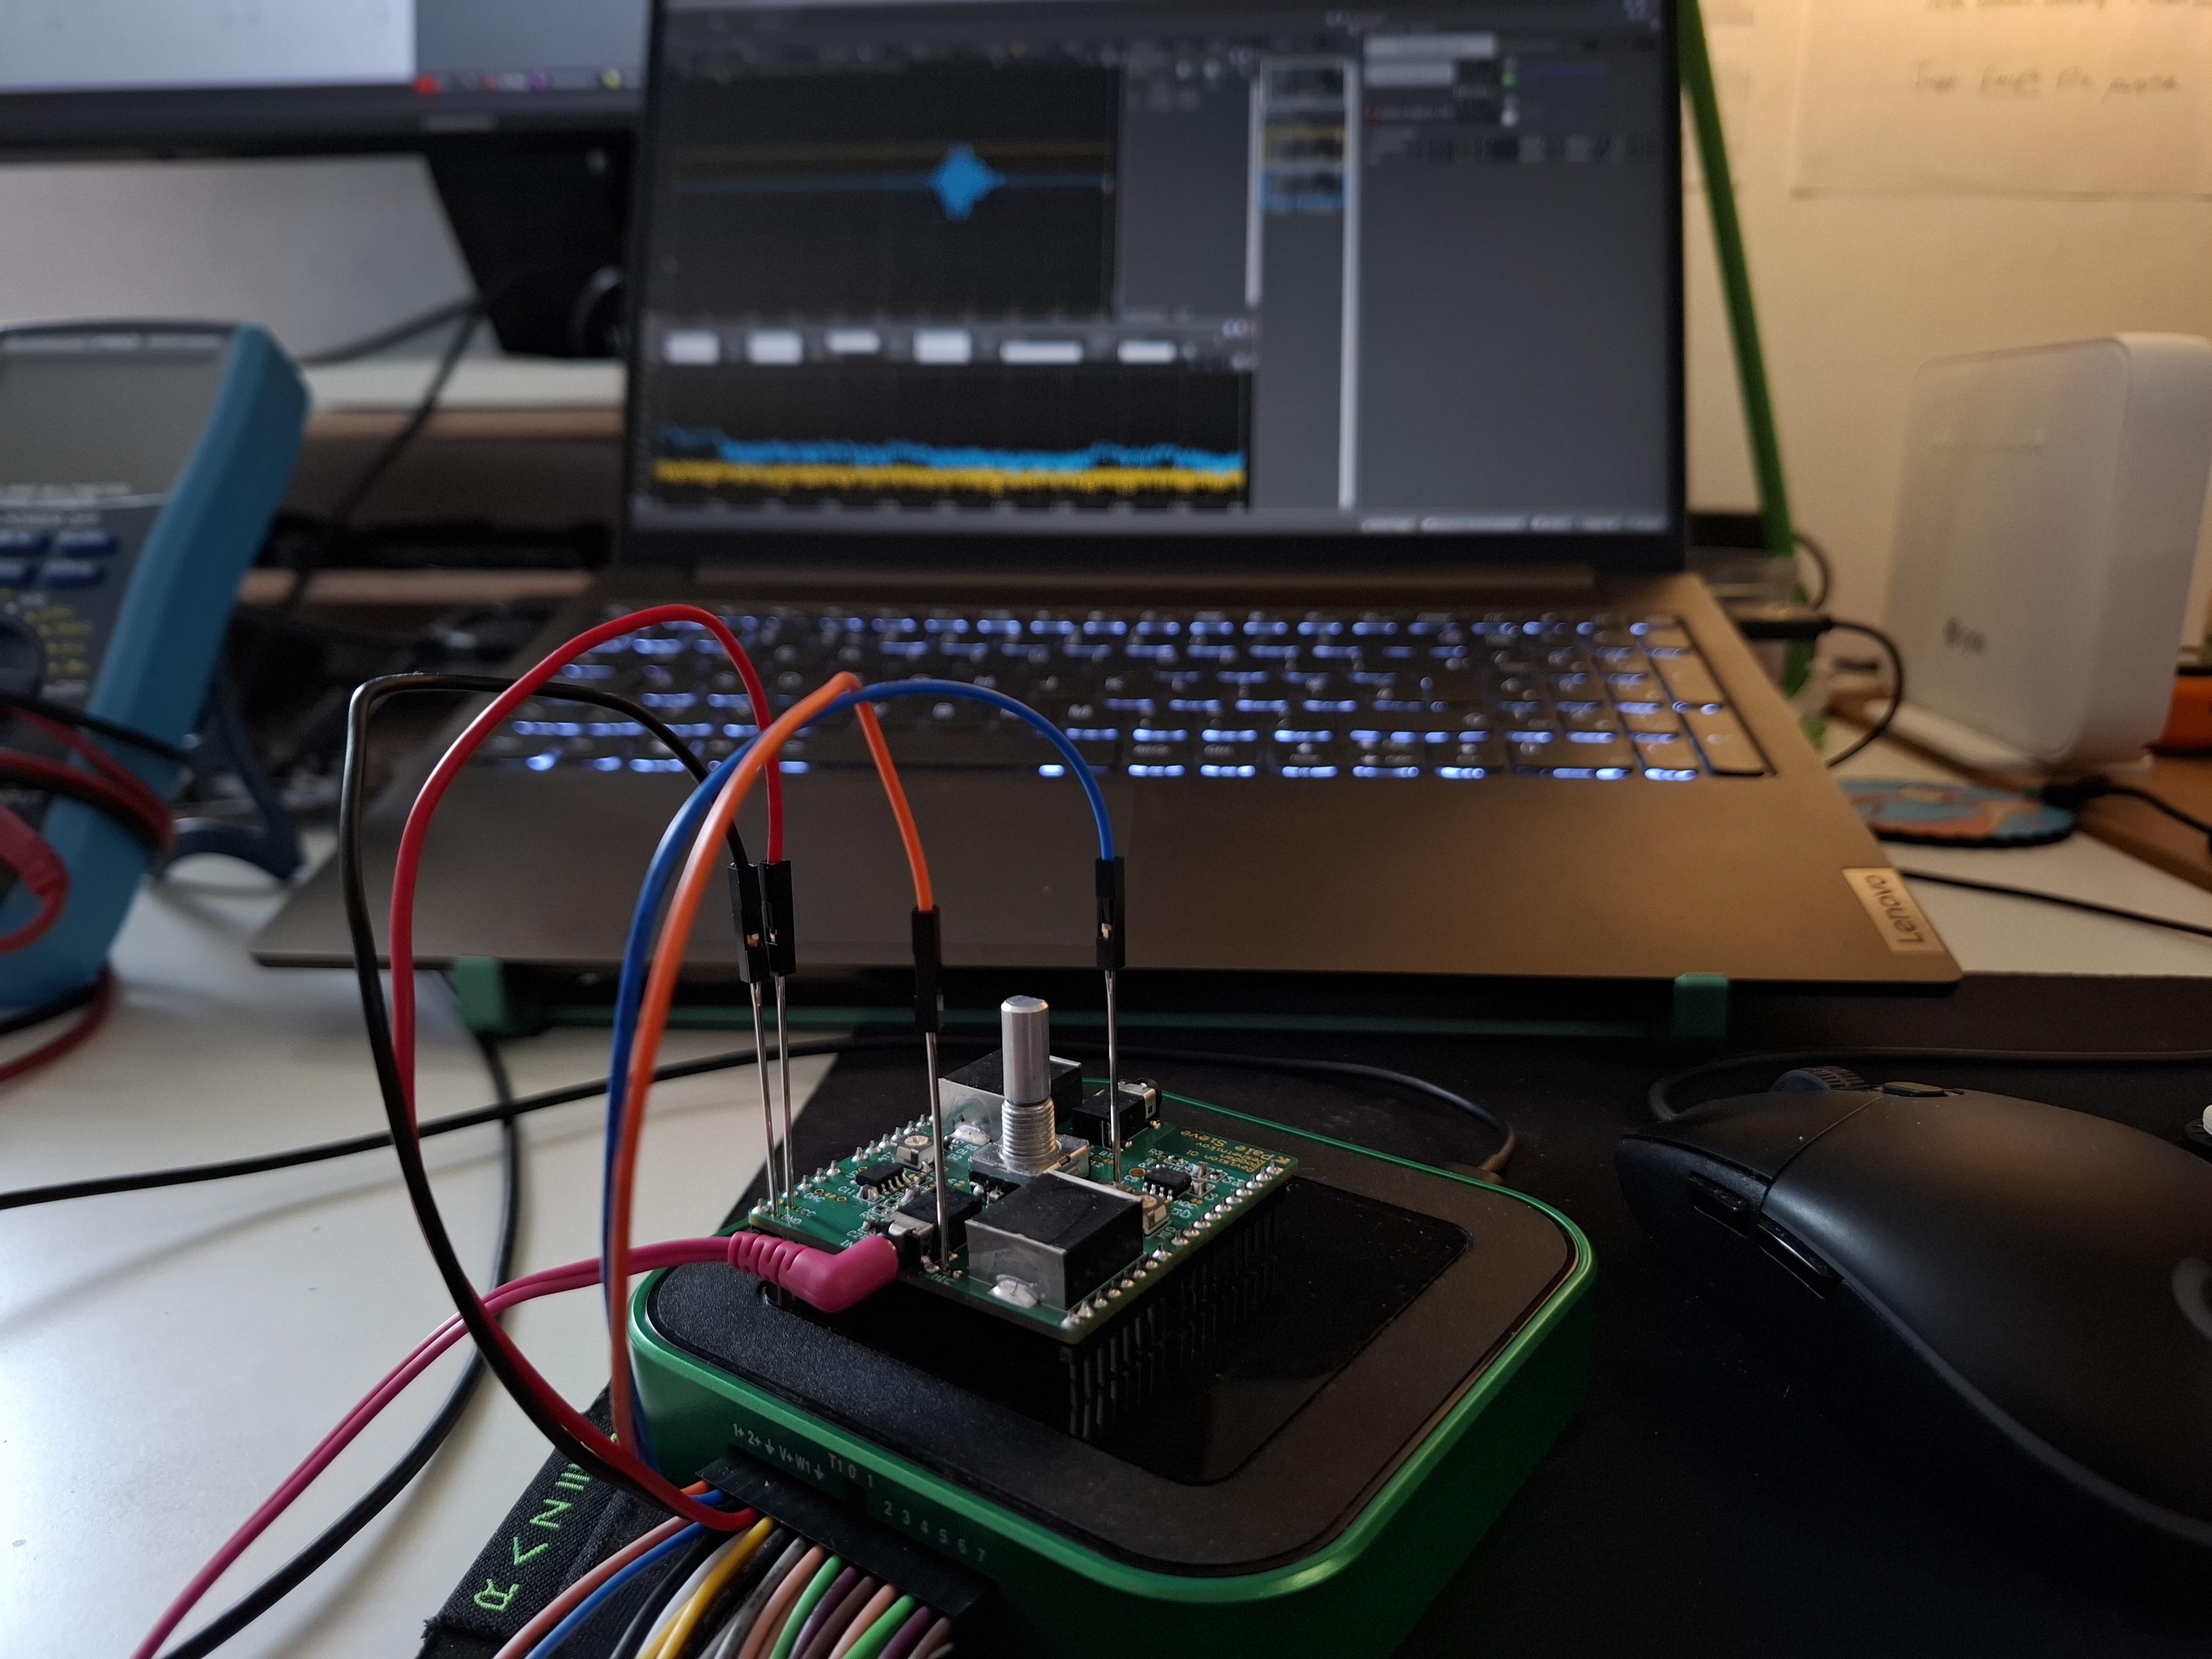
The whole construction proved to be impressively sturdy and reliable. The JJ22's are just the right size to be firmly inserted into the jumper wires eye-first, and the holes in the PCB are just the right size to keep the needles in place without requiring excessive force. Additionally, standard-issue hook lead probes can also be directly attached to the eyes of the needle — although only sideways, which puts significant weight on the needles. Instead, if you have a scope which only has BNC ports (like normal engineers do), you can put a male-to-female jumper into the needle and hook onto the hanging pin.
This needle technique saved me a lot of time and headache, and its cost is a rounding error if you have an arts & crafts supply store in your area. If you're working on low-frequency stuff and don't mind polluting your board with holes, this might make a great low-cost makeshift jig for your next project.